
What counts as a successful setup
Selecting Intel Quick Sync in Jellyfin is only configuration. A successful setup requires a playback session that actually transcodes and a generated FFmpeg log that shows the Intel hardware path for the work being claimed.
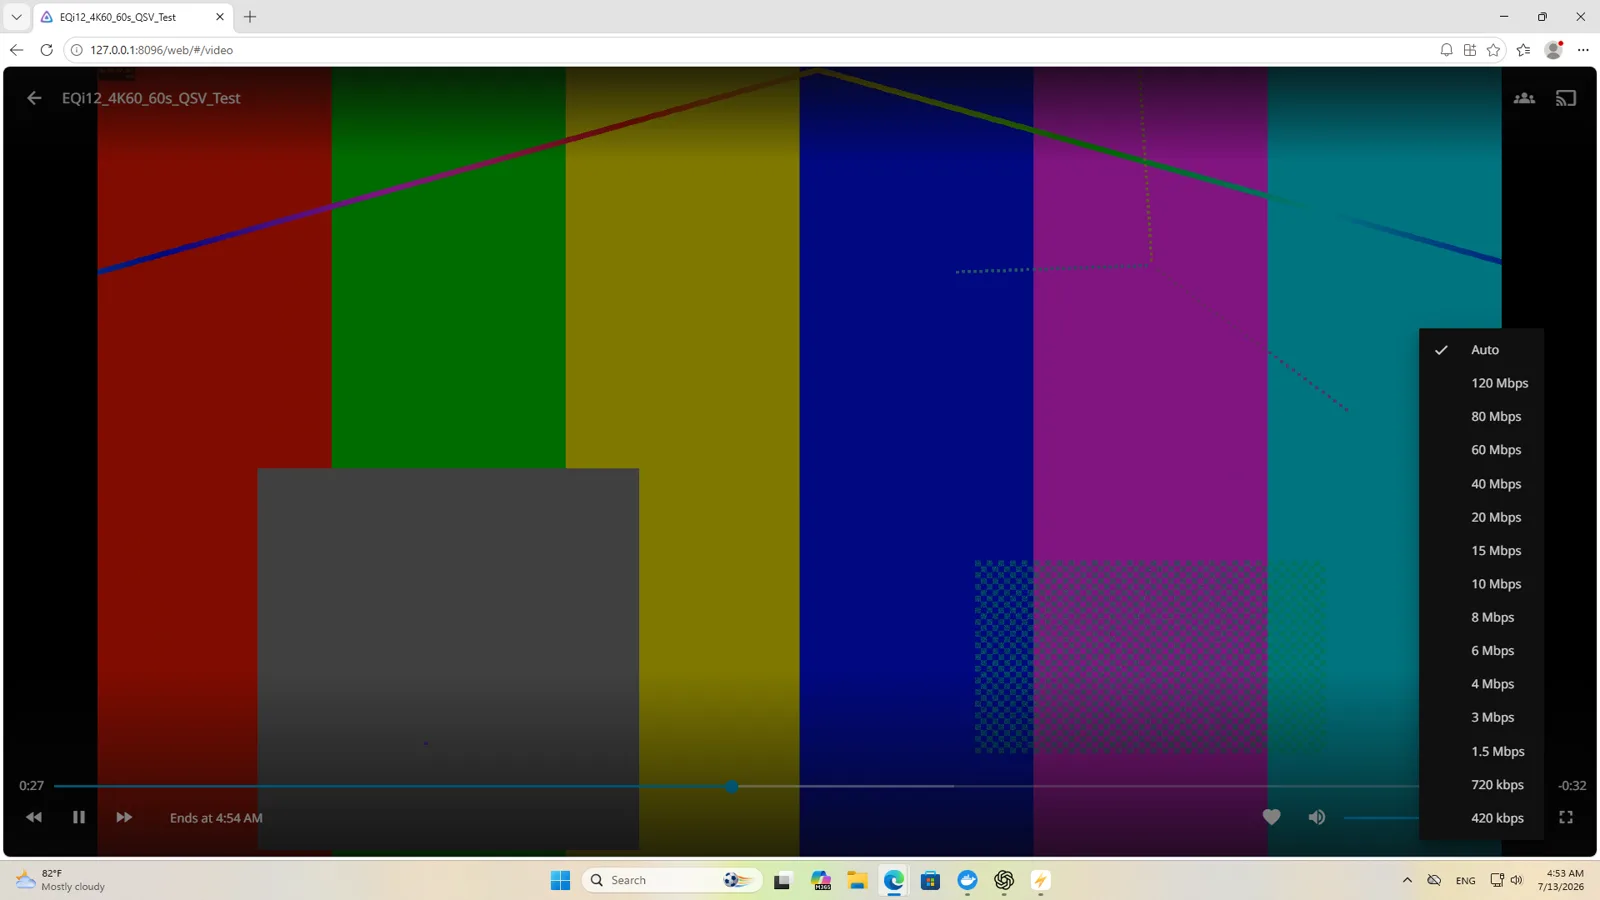
On the Core i3-1215U Beelink EQi12, native Jellyfin Server 10.11.11 converted an H.264 3840×2160 60fps source to H.264 1920×1080 60fps at roughly 10Mbps. The FFmpeg command used h264_qsv for output and vpp_qsv for hardware scaling. Two matching 4K60-to-1080p60 jobs later held about 1.01× real-time speed each.
Completion standard: the client reports Transcoding, the server log initializes QSV, the intended hardware encoder appears in the command, scaling uses the expected hardware filter, speed remains at least 1.0× for the required stream count, and playback remains stable.
Tested platform
The verified application path used:
- Intel Core i3-1215U integrated graphics;
- Windows 11;
- native Jellyfin Server 10.11.11;
- Intel graphics driver recorded in the private test inventory;
- H.264 4K60 source with known codec, frame rate and resolution;
- native Jellyfin on port 8096.
A separate Docker Jellyfin instance used port 18096 during the wider home-server tests. Keeping the ports distinct prevented logs and settings from two installations being mixed. If your machine has both, stop one instance while troubleshooting the other.

Step 1: verify the Intel graphics device
Open Device Manager → Display adapters. The Intel integrated graphics device should appear without a warning icon. Record its hardware ID, driver version and driver date. If Windows shows a generic display adapter, install the correct Intel or vendor-supported graphics driver before changing Jellyfin.
Open Task Manager → Performance → GPU and confirm that Video Decode and Video Encode graphs are available. Graph activity helps during a session, but it is supporting evidence: other applications can use the GPU, and a graph does not identify the exact FFmpeg codec path.
Do not disable the integrated graphics because the PC has no monitor attached. QSV depends on the Intel media engine and driver being available to the server process.
Step 2: identify the Jellyfin instance and service account
Open the server dashboard and record the Jellyfin version. Confirm the listening port and data directory. In Windows Services or the process list, identify the account running Jellyfin and make sure it can access the media library and transcoding directory.
If a native server and Docker container both exist, check the URL before every setting change:
- native test instance:
http://server:8096; - separate Docker instance in this lab:
http://server:18096.
A common troubleshooting mistake is changing the native dashboard while watching the container log, or testing media from a library owned by the other instance.
Step 3: configure Intel Quick Sync
In Jellyfin Dashboard, open Playback → Transcoding. Select Intel Quick Sync (QSV) as the hardware-acceleration method. Choose a writable transcoding temporary directory on storage with enough free space. The internal NVMe is a better default than the EQi12 USB path that repeatedly operated around 40MiB/s.
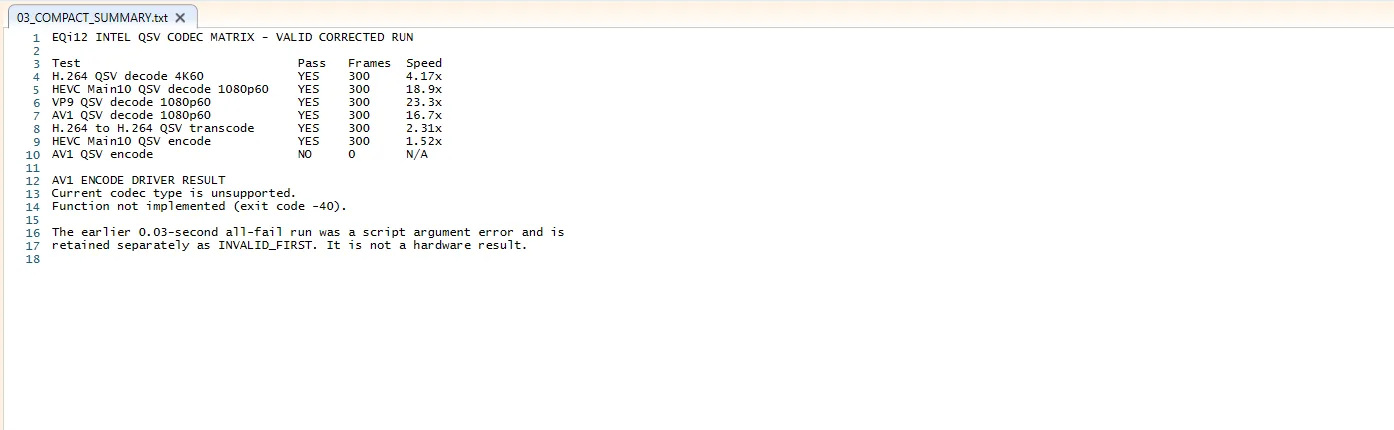
Enable hardware decoding only for codecs supported by the active driver and tested hardware. The EQi12 matrix produced these results:
| Codec path | Result |
|---|---|
| H.264 hardware decode | passed |
| HEVC Main10 hardware decode | passed |
| VP9 hardware decode | passed |
| AV1 hardware decode | passed |
| H.264 QSV encode | passed |
| HEVC Main10 QSV encode | passed |
| AV1 QSV encode | unsupported in the tested path |
Save the configuration and restart the Jellyfin service. A restart removes uncertainty about whether the active FFmpeg process inherited the new setting.
Step 4: force a transcode
Choose legal test media with a known codec, resolution, frame rate and bitrate. Start playback from a client, open its quality menu and select a target below the source requirements. In our proof run, the 4K60 H.264 source was reduced to a 10Mbps 1080p60 target. If you need help picking a realistic quality target for your clients, the Jellyfin QSV calculator estimates concurrent transcode capacity from the measured codec matrix on this hardware.
Return to the Jellyfin dashboard while the video is playing. The activity card should say Transcoding and show the conversion reason. If it says Direct Play, the server is correctly sending the source unchanged, but the session cannot validate QSV. If it says Remuxing, the container or audio path may change without a video encode.
Save a screenshot containing the active session, source and target information, but avoid exposing usernames or private library paths.
Step 5: read the generated FFmpeg log
Open the newest transcoding log from Jellyfin’s log directory. Search the command and initialization messages for:
- QSV device initialization such as
init_hw_device; - the source decoder and pixel format;
h264_qsv,hevc_qsvor the intended hardware output encoder;vpp_qsvwhen resolution or pixel-format conversion should use hardware;- output resolution and frame rate;
- repeated initialization, fallback or unsupported-codec errors;
- the ongoing
speed=value.
The verified EQi12 run contained QSV initialization, h264_qsv and vpp_qsv for 1920×1080 60fps output. That combination proves more than the Jellyfin dropdown: it shows that the actual playback job used Intel encode and hardware video processing.
A command containing libx264 instead of h264_qsv means software encoding. High CPU usage can support that diagnosis, but the command identifies it directly.
Step 6: confirm real-time speed and playback stability
The FFmpeg progress line reports speed=. A value above 1.0× means the server is processing faster than playback consumes frames. Watch a sustained portion of the session; a brief startup burst does not guarantee that the job stays real time.
In lower-level decode tests, the EQi12 achieved about 4.17× for H.264 4K60, 18.9× for HEVC Main10, 23.3× for VP9 and 16.7× for AV1. H.264-to-H.264 QSV encode measured about 2.31×, while HEVC Main10 encode measured about 1.52×. These isolated values identify codec capability but do not replace the end-to-end Jellyfin session.
During the measured Jellyfin/QSV workload, wall power was about 13W, close to the short idle observations and far below the 37W sustained CPU-load reading. That is the practical benefit of the media engine: video conversion without keeping all CPU cores under heavy software-encode load.
Step 7: test the stream count you actually need
One successful stream does not establish concurrency. The capacity test launched matching direct QSV workloads to isolate the media path.
| Concurrent workloads | Per-stream result | Conclusion |
|---|---|---|
| 2 | about 1.01× each | real-time in the tested path |
| 4 | about 0.708–0.710×, 42–43fps each | completed, but not real-time |

For deployment, reproduce the requirement with the household’s actual clients, subtitles and audio formats. Image-based subtitles may trigger extra processing, and audio conversion can consume CPU even when video uses QSV. The direct workload establishes a hardware ceiling; the application session determines user experience.
Common failure: the dashboard says Direct Play
Direct Play is not a failure. It means the client accepts the source video, audio and container without conversion. To verify QSV, lower the quality, use a client that lacks the source codec, or choose a known test combination that requires resolution or bitrate conversion.
Do not disable Direct Play permanently just to make the dashboard display Transcoding. Efficient direct delivery is normally the preferred production behavior.
Common failure: CPU is high and the log shows libx264
The job has fallen back to software encoding. Check the Intel graphics driver, Jellyfin service account, selected hardware-acceleration method, codec checkboxes and the active server instance. Restart the service and generate a new session and log.
Also check whether the source requires a path not enabled in the dashboard. Enabling every codec blindly is not a solution; an unsupported decode selection can prevent playback or force fallback in a different stage.
Common failure: QSV encode works but scaling is not hardware accelerated
When the output resolution changes, look for vpp_qsv. If the log uses a CPU scaling filter instead, decode or encode may still be accelerated while resizing consumes CPU. Compare the complete filter chain and pixel formats rather than searching for one occurrence of qsv.
The verified 4K60-to-1080p60 EQi12 session included vpp_qsv, so its scaling claim is tied to the actual FFmpeg command.
Common failure: AV1 encode returns an error
The i3-1215U test successfully decoded AV1 with QSV but did not expose a working AV1 hardware encoder in this runtime. The failed encode returned unsupported-codec and function-not-implemented errors. Select H.264 or a verified HEVC path for transcoded output.
This distinction is easy to miss in product descriptions. “AV1 support” may mean decode only. Always separate input decode capability from output encode capability.
Common failure: the wrong Jellyfin installation is being tested
If changes seem to have no effect, verify the browser URL, process, port and log directory. Stop the Docker instance while testing native Windows, or stop the native service while validating the container. Delete old transcoding logs or note their timestamps so the newest session is unambiguous.
The test record should include Jellyfin version, server type, port, service account, graphics driver, source ffprobe output, client quality screenshot and full FFmpeg log.
Preserve useful evidence without exposing private data
Save:
- the Jellyfin version page;
- hardware-acceleration settings;
- active session showing Transcoding;
- source codec and resolution;
- complete generated FFmpeg command and progress;
- Task Manager video-engine graphs during the run;
- driver version;
- power reading if efficiency is part of the claim;
- concurrency results and failure count.
Before publication, remove API tokens, usernames, library paths, IP addresses and media names that reveal personal information. Keep an untouched private copy with hashes so the edited image can still be traced to the test.
Recommended production settings
Use Direct Play whenever the client supports the source. Keep QSV available for remote bandwidth limits and incompatible devices. Place temporary transcodes on the internal SSD, set a cleanup policy, and monitor free space. Test subtitles and the two most demanding simultaneous clients before declaring the server ready.
The EQi12’s two real-time matching 4K60 conversions are strong for a low-power mini PC. Plan around that tested capacity rather than the four jobs that completed below real time.
Bottom line
Intel QSV on Windows Jellyfin was not merely enabled on the EQi12; it was verified in the generated FFmpeg path. The server used h264_qsv and vpp_qsv for a 4K60-to-1080p60 session, decoded H.264, HEVC Main10, VP9 and AV1 in hardware, and sustained two matching real-time conversions. AV1 hardware encode was unavailable, and four matching 4K60 conversions fell below real time.
Use the complete Jellyfin setup guide for installation, library configuration and remote access, the full Jellyfin performance report for the application results, the QSV codec matrix for individual codecs, and the Windows home-server build for recovery and auto-start. If the dashboard still shows software transcoding after this setup, work through the software-transcoding troubleshooting checklist. Still deciding between media servers? The Jellyfin vs Plex comparison puts the measured Quick Sync numbers next to what a Plex Pass costs in 2026.