
What this build is designed to do
This build turns the Core i3-1215U Beelink EQi12 into a Windows-first home server that can return after updates, shutdowns and short power interruptions without someone standing beside it. The workload is intentionally realistic for a small home lab: native Jellyfin for Intel Quick Sync, WSL2 and Docker Desktop for nginx, PostgreSQL and Redis, SMB for local file access, and Wake-on-LAN for remote startup.
A desktop benchmark does not answer the questions that determine whether this arrangement is useful. Will the correct network adapter receive a magic packet? Will Docker start before anyone signs in? Will application data still be present after a restart? Will the BIOS boot the PC when AC power returns? This guide is built around those failure points and includes the measured results from the finished system. If you are starting from scratch, the Windows mini PC home server roadmap lays out the full stage order — hardware checks, firmware, services, stability proof, remote wake, backups — that this build follows, with links to each step.
Finished result: five normal restarts and five shutdown WOL cycles passed, AC-return recovery passed three out of three times, Docker auto-start passed three repeated cycles, and the service stack completed 12.57 hours of monitoring without a container-health failure. S3 sleep WOL was less reliable at four successes in five cycles.
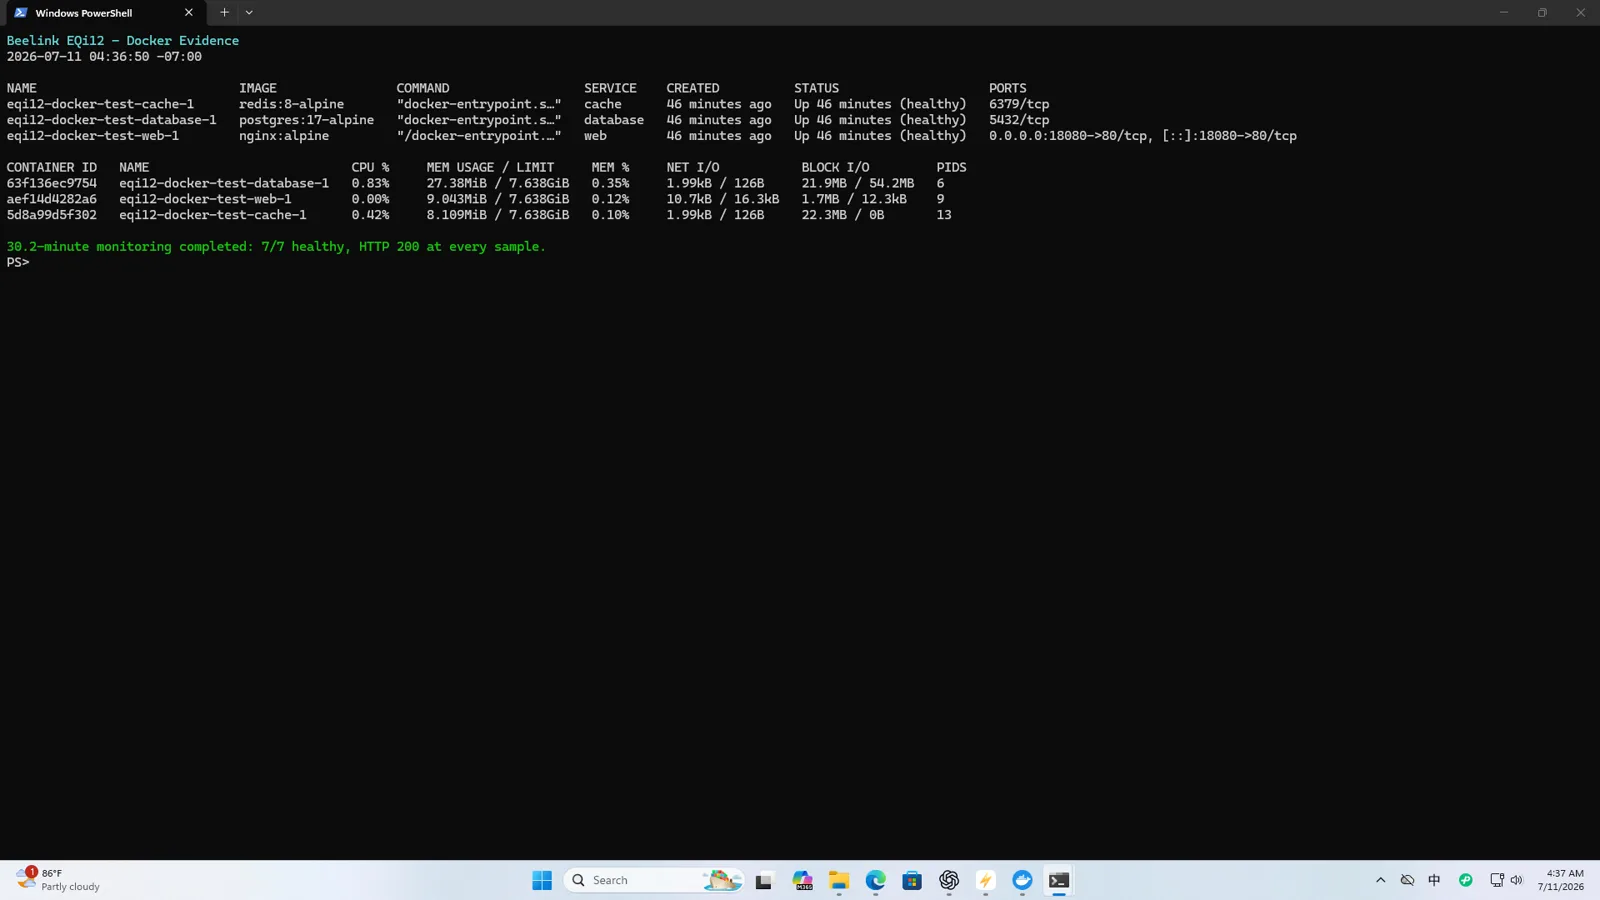
Hardware and operating-system baseline
The fully inventoried unit contained an Intel Core i3-1215U, 16GB DDR4-3200 memory, a 512GB WD PC SN540 NVMe SSD, two Realtek gigabit Ethernet controllers and an Intel AX200 Wi-Fi 6 adapter. BIOS EQI12D405 exposed VT-d, S3 sleep and State After G3. Windows 11 was the primary system; Ubuntu Live provided an independent hardware-enumeration check.
Before changing the server, create a unit record containing the CPU, memory modules, SSD model and firmware, BIOS revision, Windows build, graphics driver and all three network devices. With two identical Realtek friendly names, also record the hardware ID and physical Ethernet jack associated with each adapter. Hide MAC addresses, complete instance IDs, UUIDs and serial numbers in anything published online.
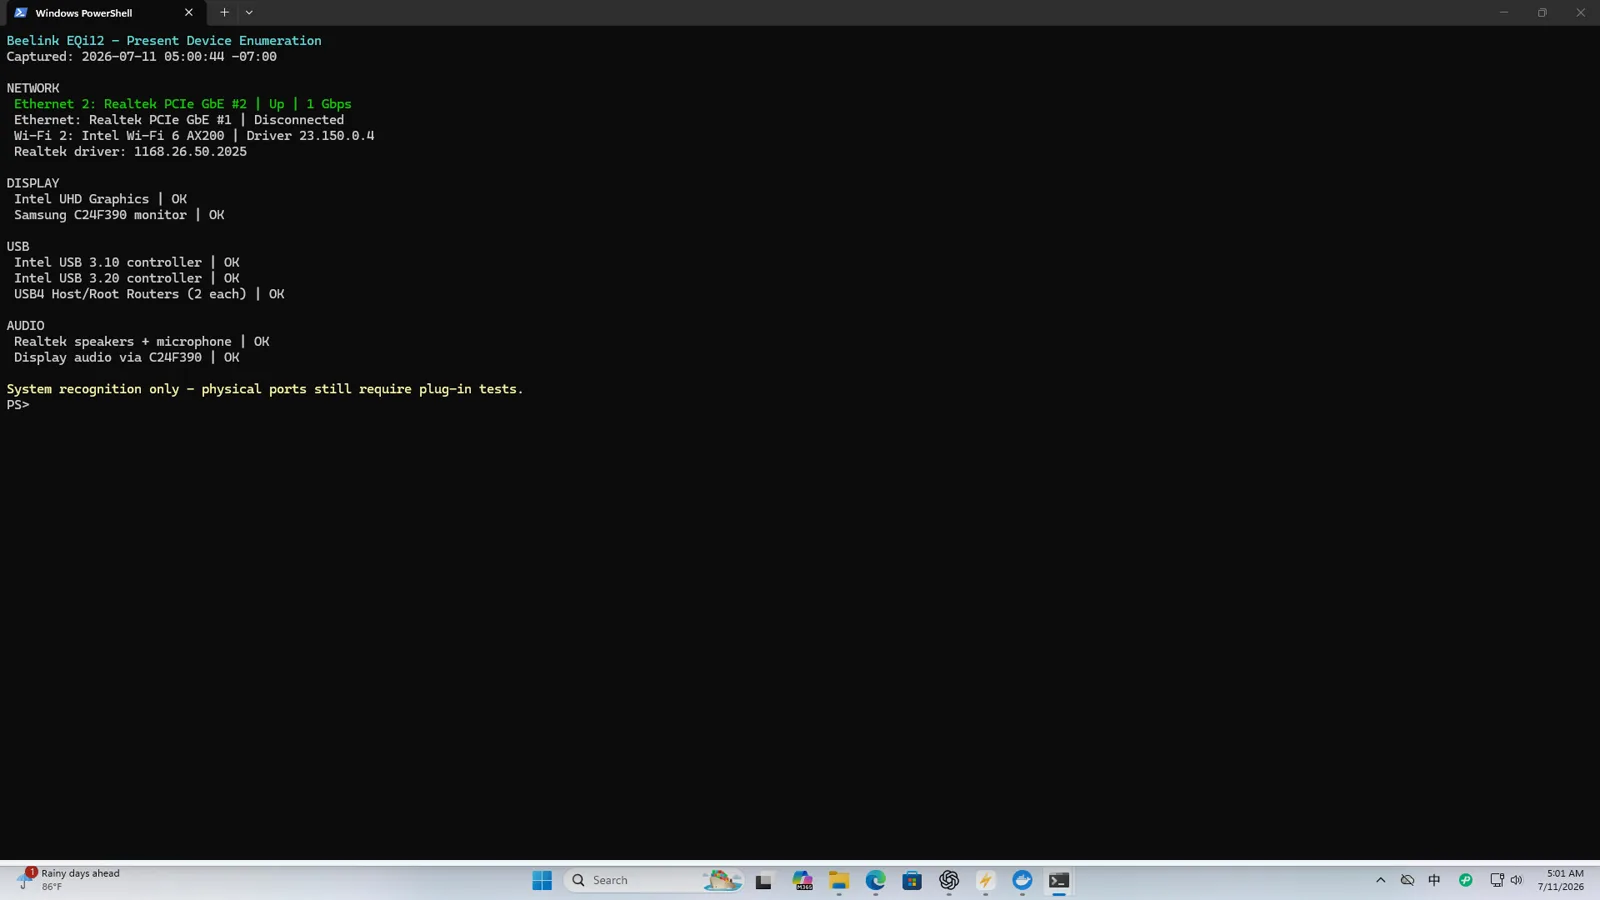
Step 1: prepare Windows for a server role
Install Windows updates and the intended Intel graphics and Realtek network drivers, then reboot before measuring anything. Give the machine a unique name and reserve its LAN address in the router or use a carefully documented static address. If this is one of several EQi12 units, do not clone the supplied Windows image unchanged.
Two tested retail units shared the same Machine SID prefix. A single standalone PC can still work normally, but repeated identities are undesirable in domains, central management and clustered environments. Use a properly licensed clean Windows installation or a supported Sysprep generalization process before placing multiple machines into service. For the evidence, deployment boundary and supported remediation path, see the duplicate Machine SID guide.
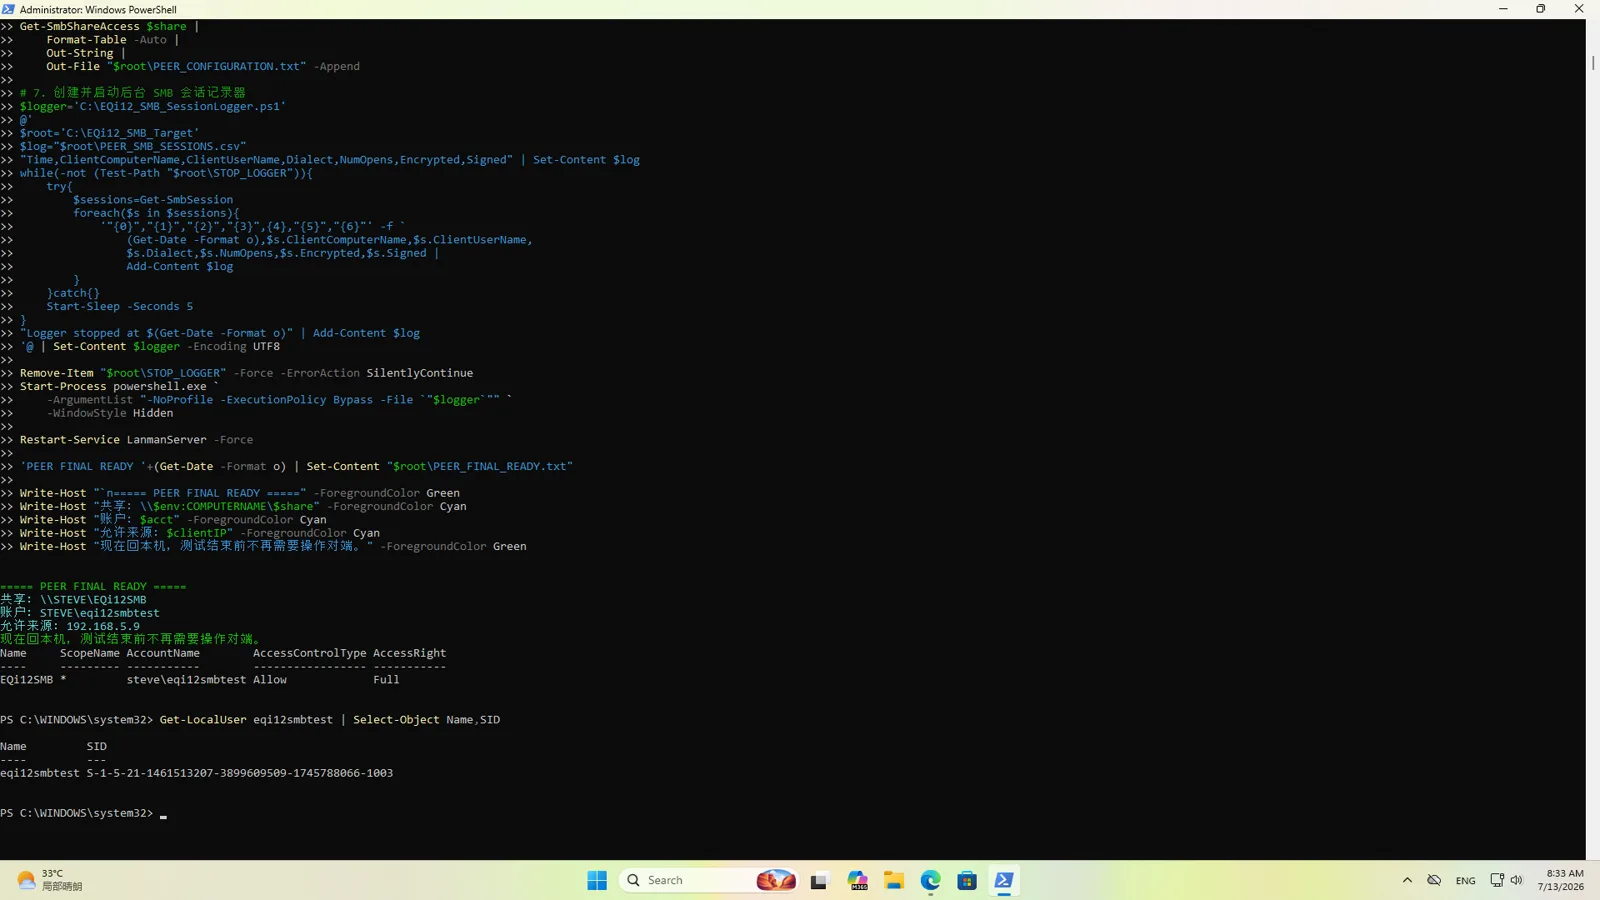
Create separate local accounts for administration and routine service work where practical. Enable Windows Defender and keep RDP disabled unless it is actually needed. The audit on this system found SMB1 enabled and SMB signing not enforced; a production build should disable SMB1 and review signing requirements before sharing data beyond a trusted LAN.
Step 2: configure the BIOS for unattended recovery
Enter the AMI Aptio firmware and photograph the original Main, Advanced, Chipset, Security and Boot pages. On this revision, the important server controls were spread across several menus rather than grouped under one “server” page.
For this build:
- Intel virtualization was available for WSL2 and Docker.
- VT-d was shown as supported and enabled.
- ACPI exposed S3 Suspend-to-RAM.
- State After G3 offered S0 State and S5 State.
- State After G3 was set to S0 State for automatic boot after restored power.
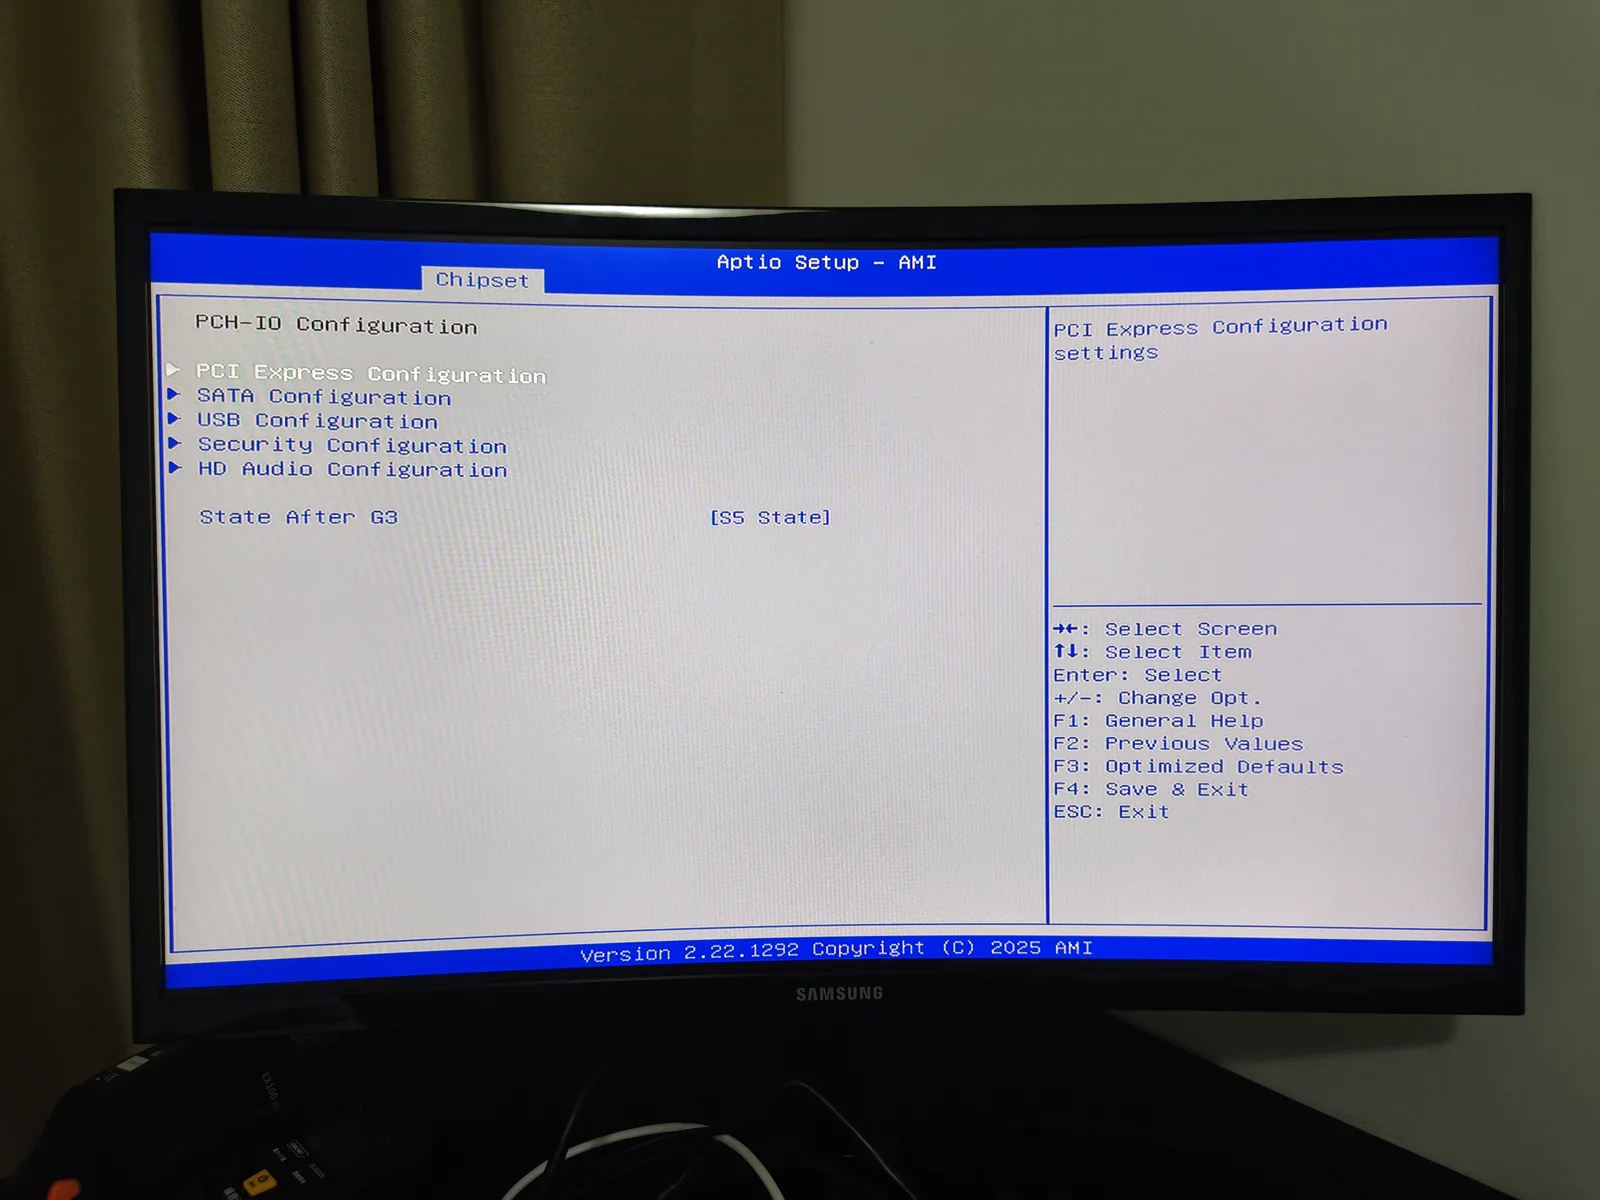
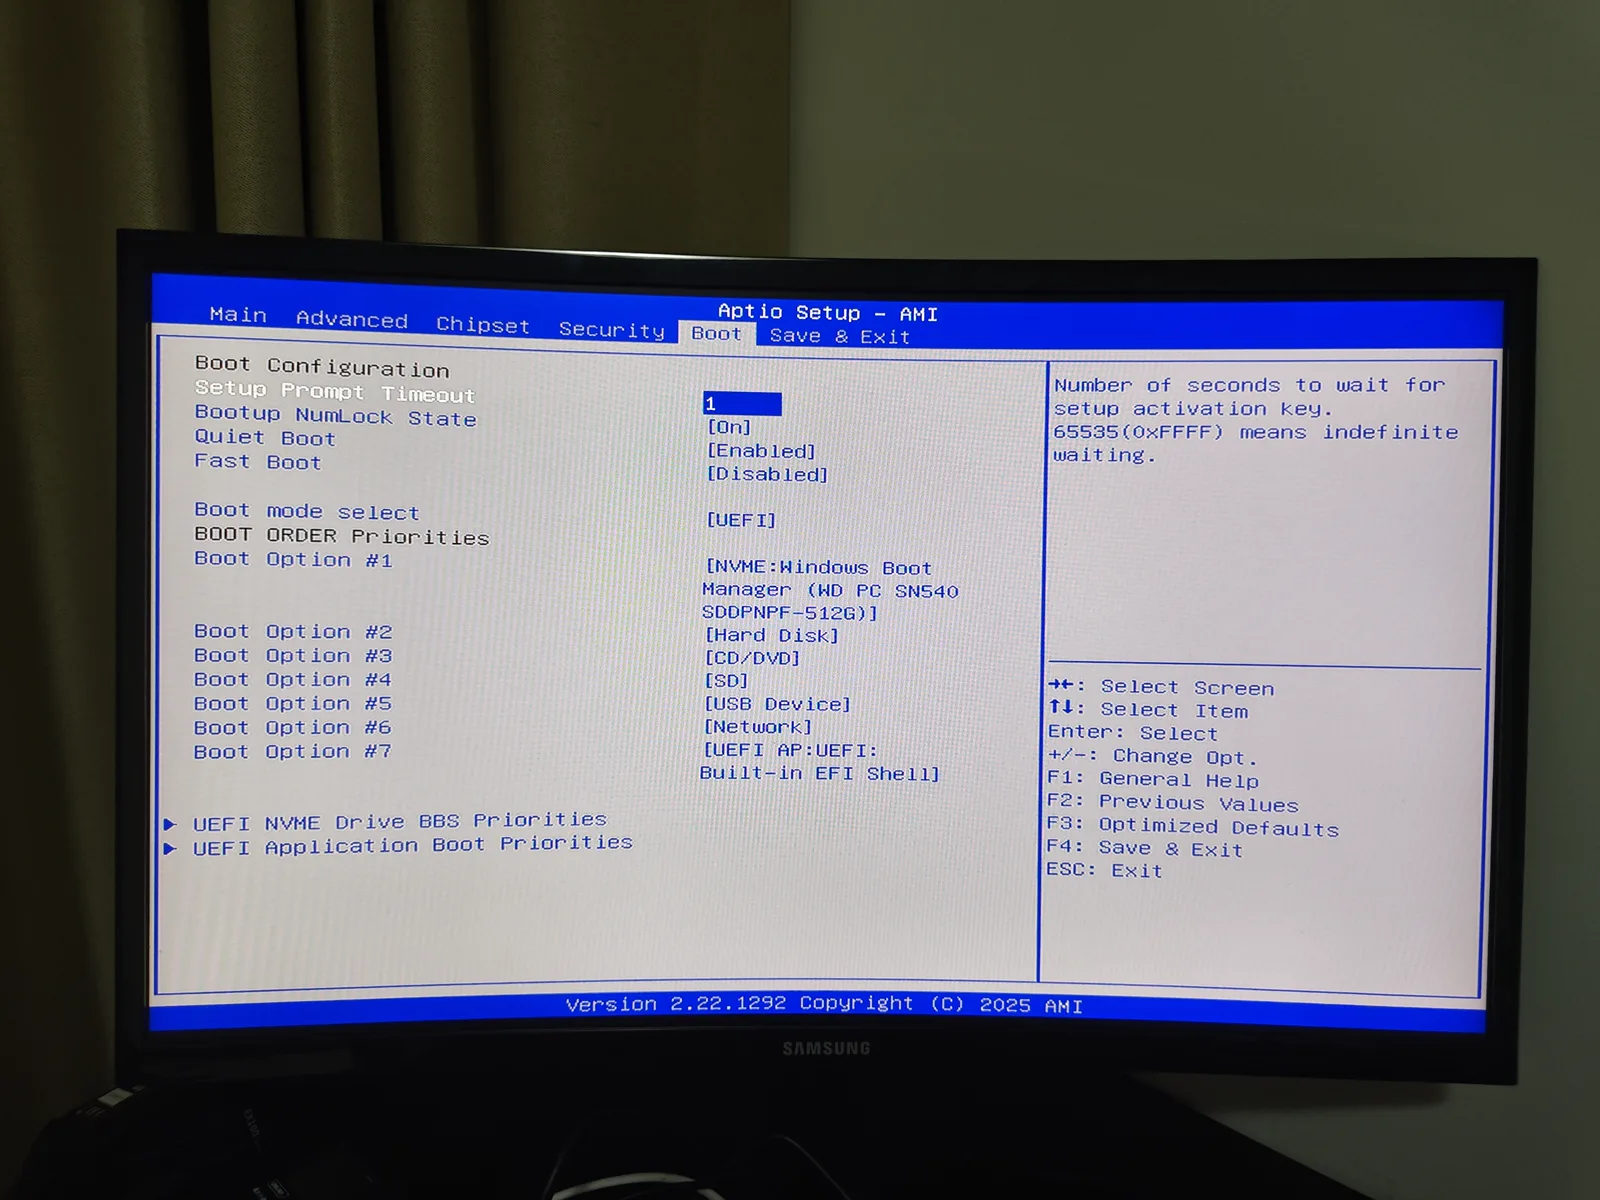
S0 after G3 means the machine enters the working state when power returns; S5 leaves it shut down. This setting is about availability, not data protection. A UPS and application-consistent backups still matter because automatic boot cannot undo an interrupted database write.
Step 3: map the two Ethernet ports
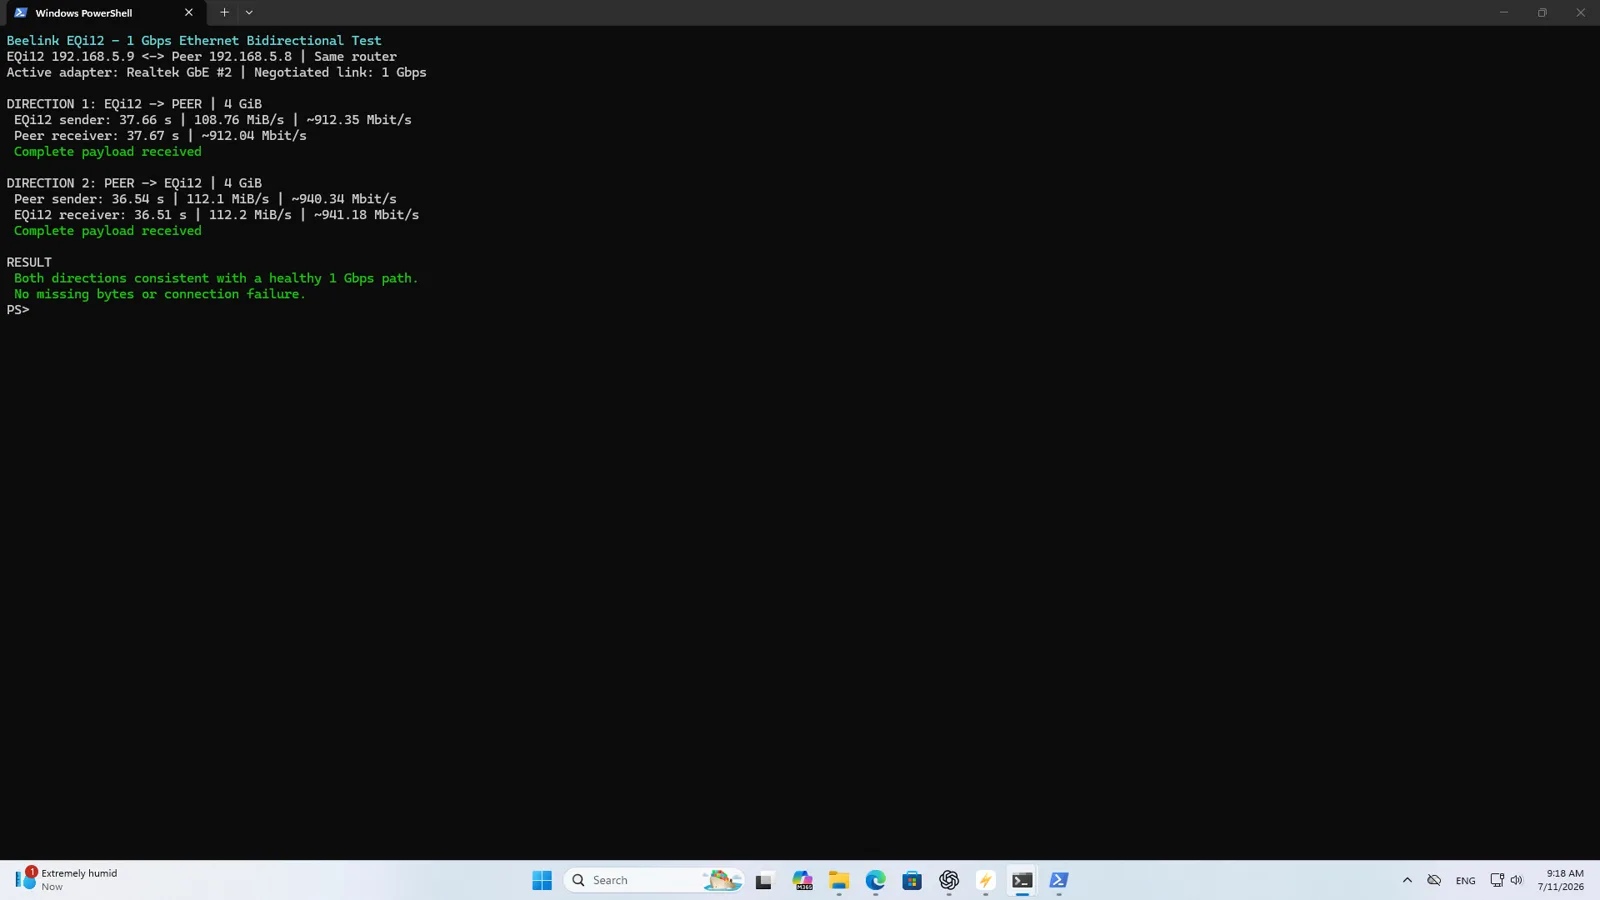
Connect only one Ethernet cable. In PowerShell, inspect the active adapter, its link speed and hardware identity, then label the physical jack in the test record. Move the cable to the second jack and repeat. Do not rely on “Realtek PCIe GbE Family Controller” and “#2” remaining stable after a driver reinstall.
Both physical ports on this unit measured about 891–941Mbps across directional tests. That matches Beelink’s official dual-Gigabit specification. Either is adequate for the server, but all Wake-on-LAN settings and magic packets must target the jack that remains connected.
Wi-Fi used an Intel AX200 and performed well at close range, but wired Ethernet is the preferred server connection. It has more predictable latency, preserves WOL behavior and avoids changing radio conditions during backup or media workloads.
Step 4: configure shutdown Wake-on-LAN
In Device Manager, open the Realtek adapter connected to the server LAN. Under Advanced, enable Wake on Magic Packet and Shutdown Wake-On-Lan if the installed driver exposes them. Keep the normal link-speed value unless troubleshooting requires the driver’s lower shutdown-link option.
Under Power Management, enable:
- Allow this device to wake the computer.
- Only allow a magic packet to wake the computer.
- Allow the computer to turn off this device to save power, initially; change it only if sleep tests fail.
Then open Control Panel → Power Options → Choose what the power buttons do → Change settings that are currently unavailable, and disable Turn on fast startup. Fast Startup can turn a Windows shutdown into a hybrid state that complicates WOL testing.
Use another device on the LAN to send the packet. Confirm the target MAC privately, shut Windows down normally, wait until network activity settles, send one magic packet and time from the send action until Jellyfin or another known service responds. Repeat the complete cycle rather than sending several packets into one boot.
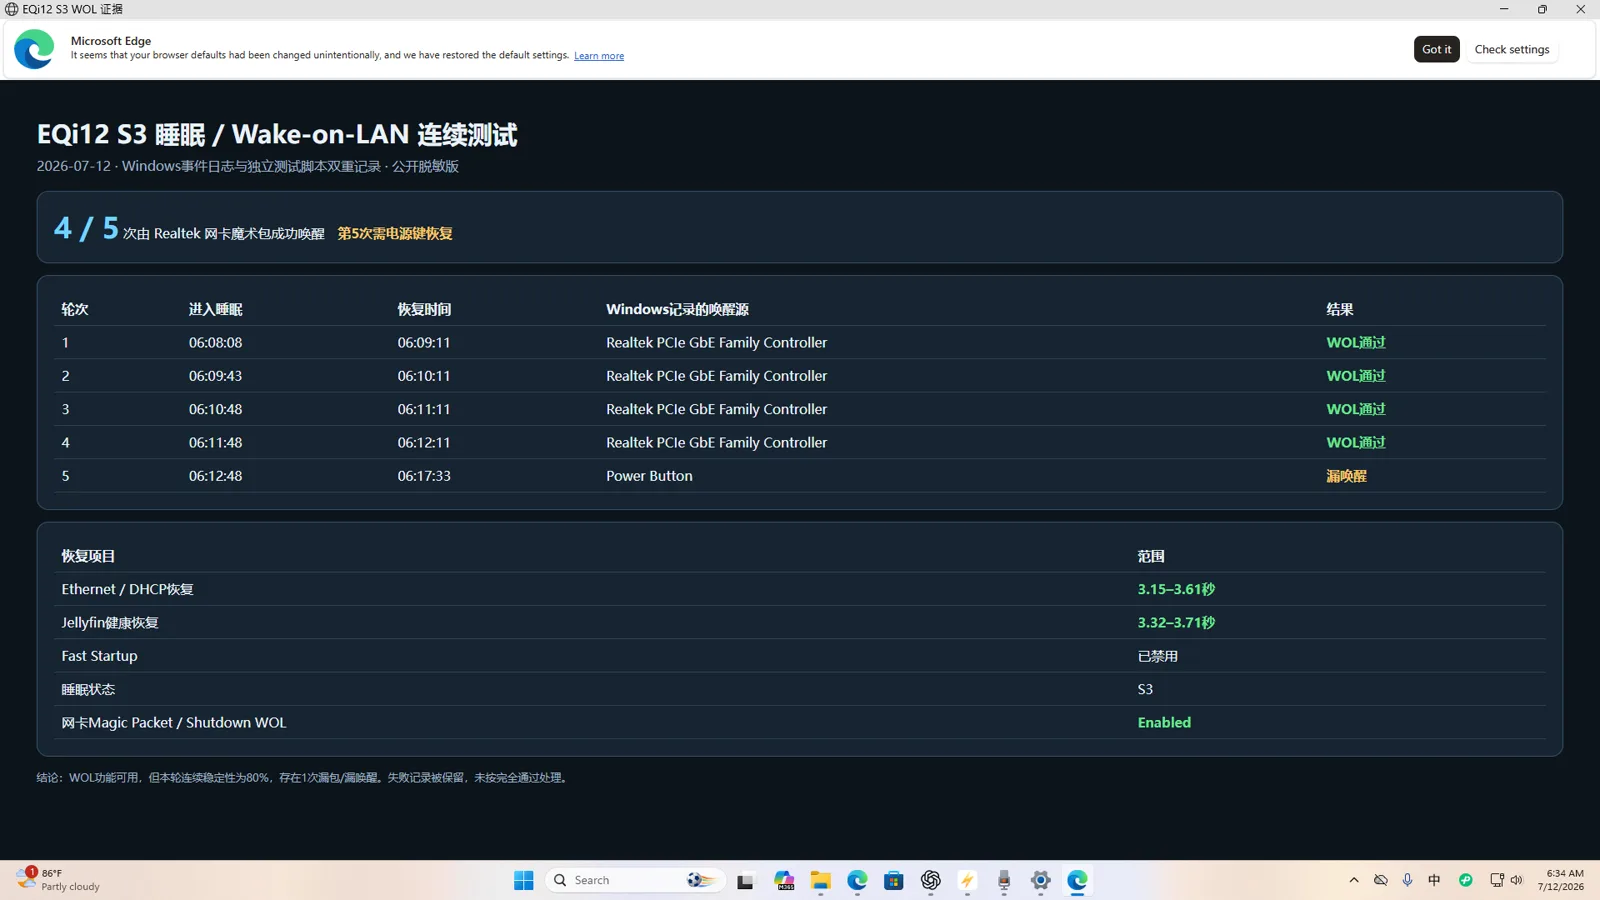
Measured WOL result
| Power state | Cycles | Result | Application return |
|---|---|---|---|
| Normal shutdown / S5 | 5 | 5 successful | Jellyfin about 42 seconds average |
| Sleep / S3 | 5 | 4 successful | one cycle required the power button |
S3 and normal shutdown both read about 1W on the whole-watt meter used here. With no measured standby advantage and less consistent wake behavior, S5 shutdown is the better default for this build.
Step 5: install WSL2 and Docker Desktop
Enable the Windows features required by WSL2, install an Ubuntu distribution and verify that hardware virtualization is active. Install Docker Desktop with the WSL2 backend, then confirm from the terminal that the expected Docker context, engine, storage and WSL integration are active.
Do not mark the step complete when Docker Desktop opens. Run docker info, start the actual Compose stack, inspect container health and reach each service from another device. This build used nginx, PostgreSQL 17 and Redis 8 for repeatable service checks. Native Jellyfin used port 8096; the separate container instance used port 18096 so the two installations could not be confused.
The mixed benchmark later showed that nginx, PostgreSQL and Redis could run together with zero request or transaction errors while sampled CPU averaged 63.42%. That is sufficient headroom for this light home-server stack, though it is not a capacity promise for arbitrary public applications.

Step 6: make Docker and the services return automatically
Docker Desktop must start with Windows, and every long-running container needs an explicit restart policy such as unless-stopped where appropriate. A healthy policy is not enough if Windows waits for an interactive login, so test from a complete restart and observe the system before opening Docker Desktop manually.
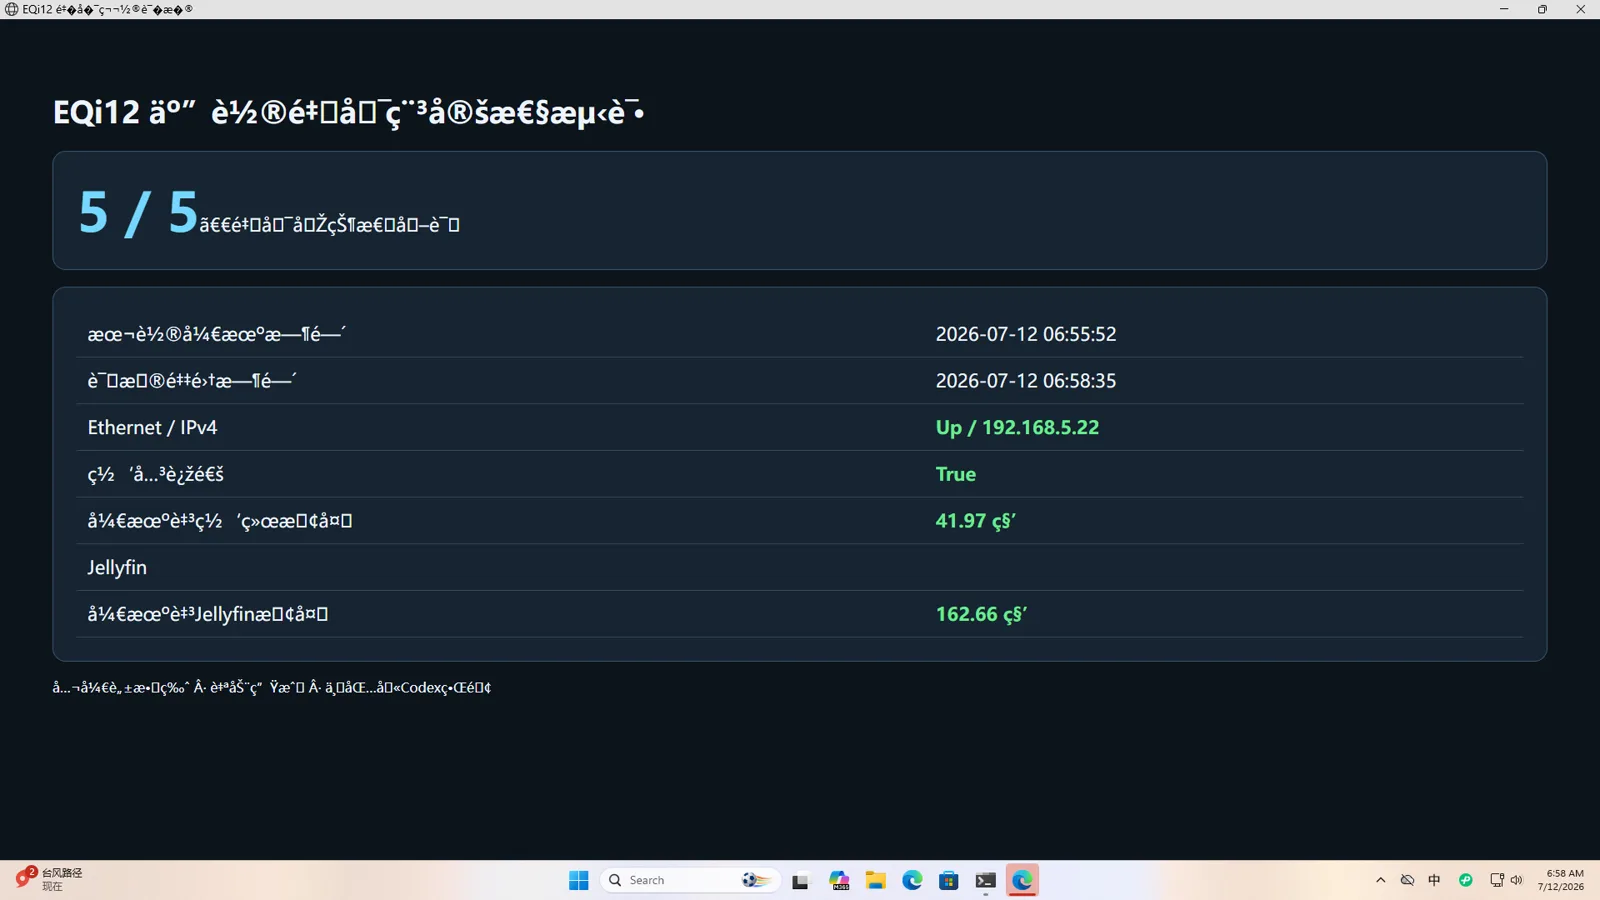
Three repeated auto-start cycles passed, followed by an additional configuration check. After each cycle we verified:
- Windows reached the network.
- Docker Engine became available.
- nginx returned an HTTP response.
- PostgreSQL accepted a query and retained its marker.
- Redis returned its marker.
- Jellyfin’s endpoint became available.
- no container entered a restart loop.
Step 7: verify AC-loss recovery
With State After G3 set to S0, start the system normally and confirm all services are healthy. Remove input power, wait until the unit and link lights are fully off, restore power and start a timer. Do not press the front power button. Record whether the system boots, when the network returns and when the selected application endpoint responds.
The EQi12 automatically returned in all three cycles. Jellyfin became available in about 40.77 seconds on average. The original archive includes the BIOS page, physical power-removal and power-return video, startup footage and service checks.
Compressed web copy of one power-removal, restored-power and automatic-boot recording. The untouched source video and hashes remain in the private archive.
Windows desktop operation during the monitored stability window. Docker containers, Jellyfin and network services were all running. This footage shows the system state during the 12.57-hour monitored operation period.
The result shows that the configured machine returns. It does not make sudden power loss safe for databases. Use a UPS, configure graceful shutdown where possible and test restoration from an application-aware backup.
Step 8: prove backup and restore
A container restart confirms availability, not recoverability. This build therefore tested nginx configuration, PostgreSQL and Redis separately.
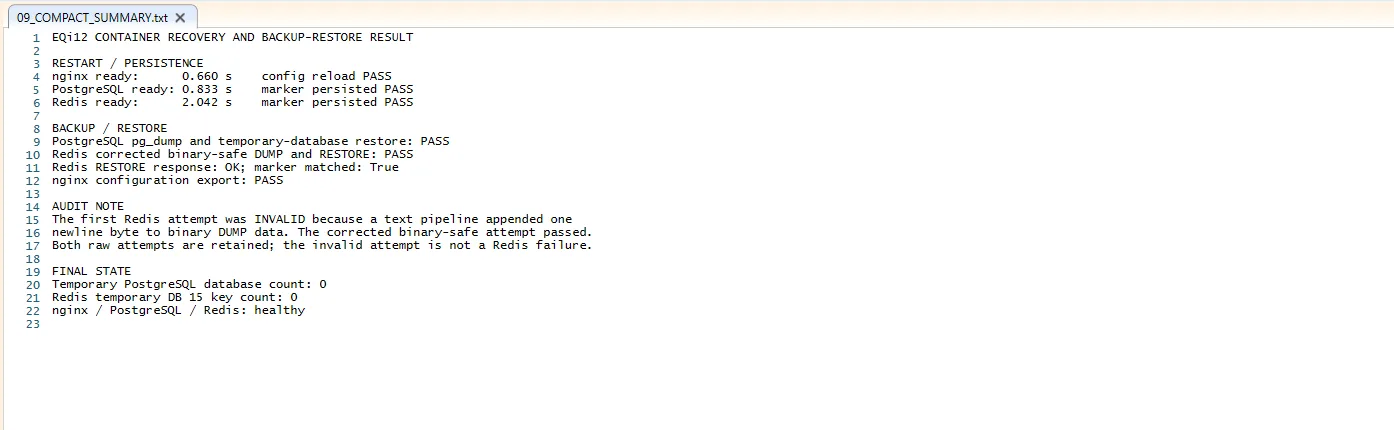
- nginx configuration reload passed in 0.660 seconds.
- PostgreSQL retained a marker after restart and verified it after 0.833 seconds.
- Redis retained a marker after restart and verified it after 2.042 seconds.
- PostgreSQL
pg_dumpexport and restoration into a temporary database passed. - Redis backup and binary-safe restore passed.
The first Redis restore attempt used a PowerShell text pipeline, which changed the binary dump and made that attempt invalid. The corrected procedure moved the payload without text conversion, restored it and verified the marker. Recording that correction is useful because the same mistake can make a good Redis backup appear damaged.
Store backup scripts, schedules and restore notes outside the container. Keep at least one copy away from the EQi12 and the attached drive. Periodically restore into a temporary target; a backup that has never been restored is only an assumption.
Step 9: monitor a normal operating window
The finished stack was sampled for 12.57 hours, producing about 150 observations. There were zero HTTP failures, zero container-health failures, zero running-state failures and zero container restarts. Maximum sampled host CPU was 52%, while minimum available memory was 5,472MB.
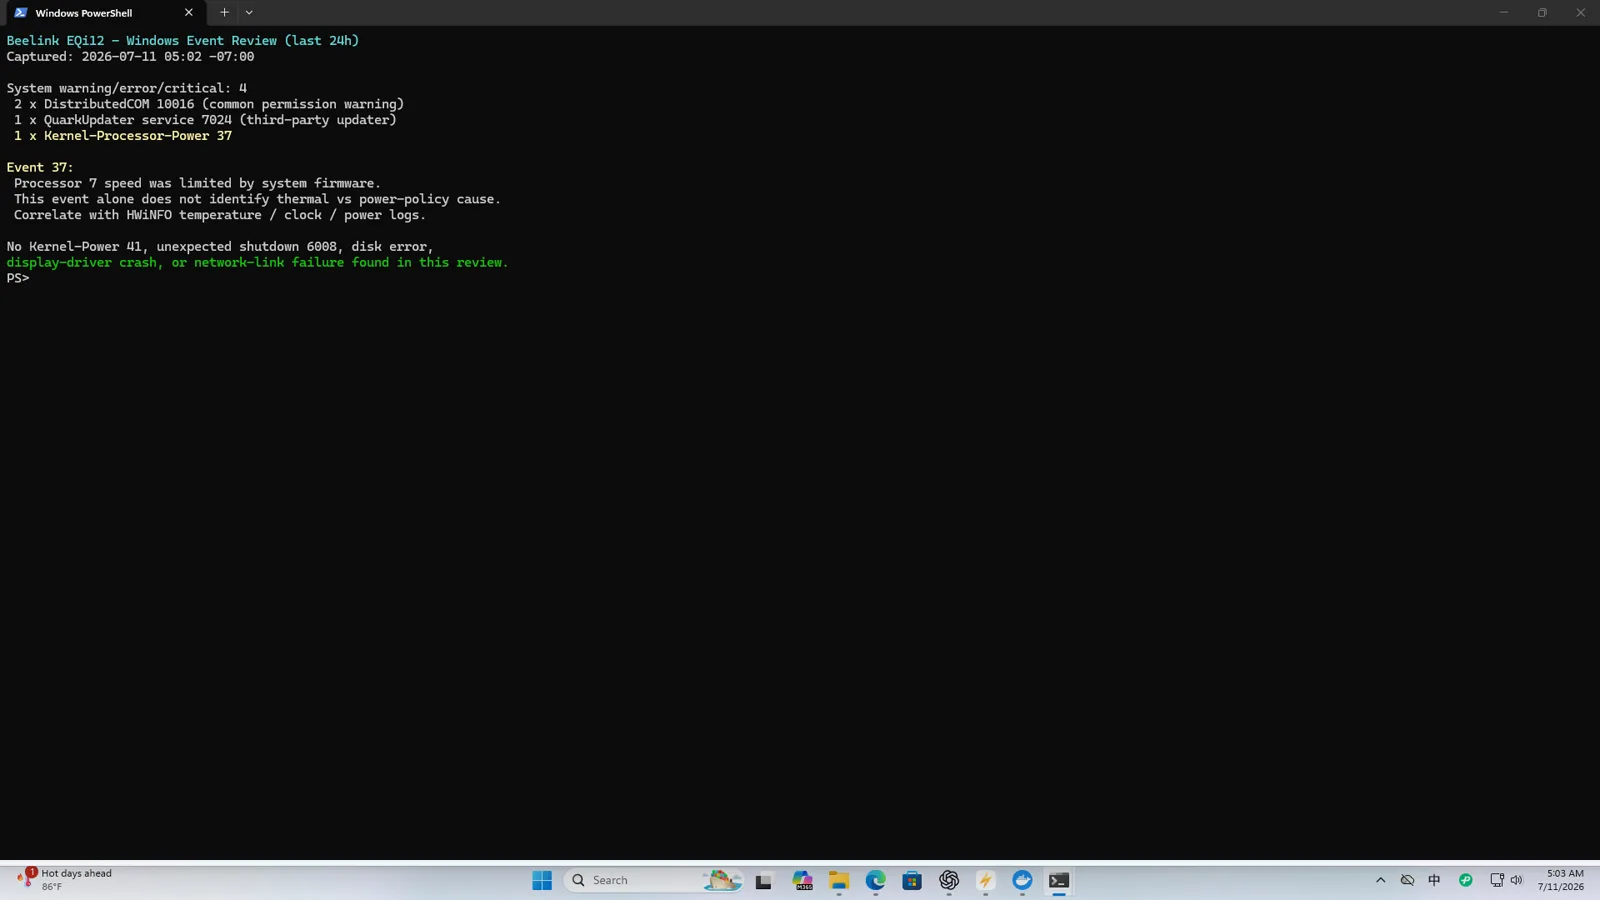
This is long enough to catch a missed restart policy, gradual memory pressure or a basic health-check failure. Continue ordinary event-log review and backup verification after deployment rather than treating one clean window as the end of maintenance.
Power and storage choices
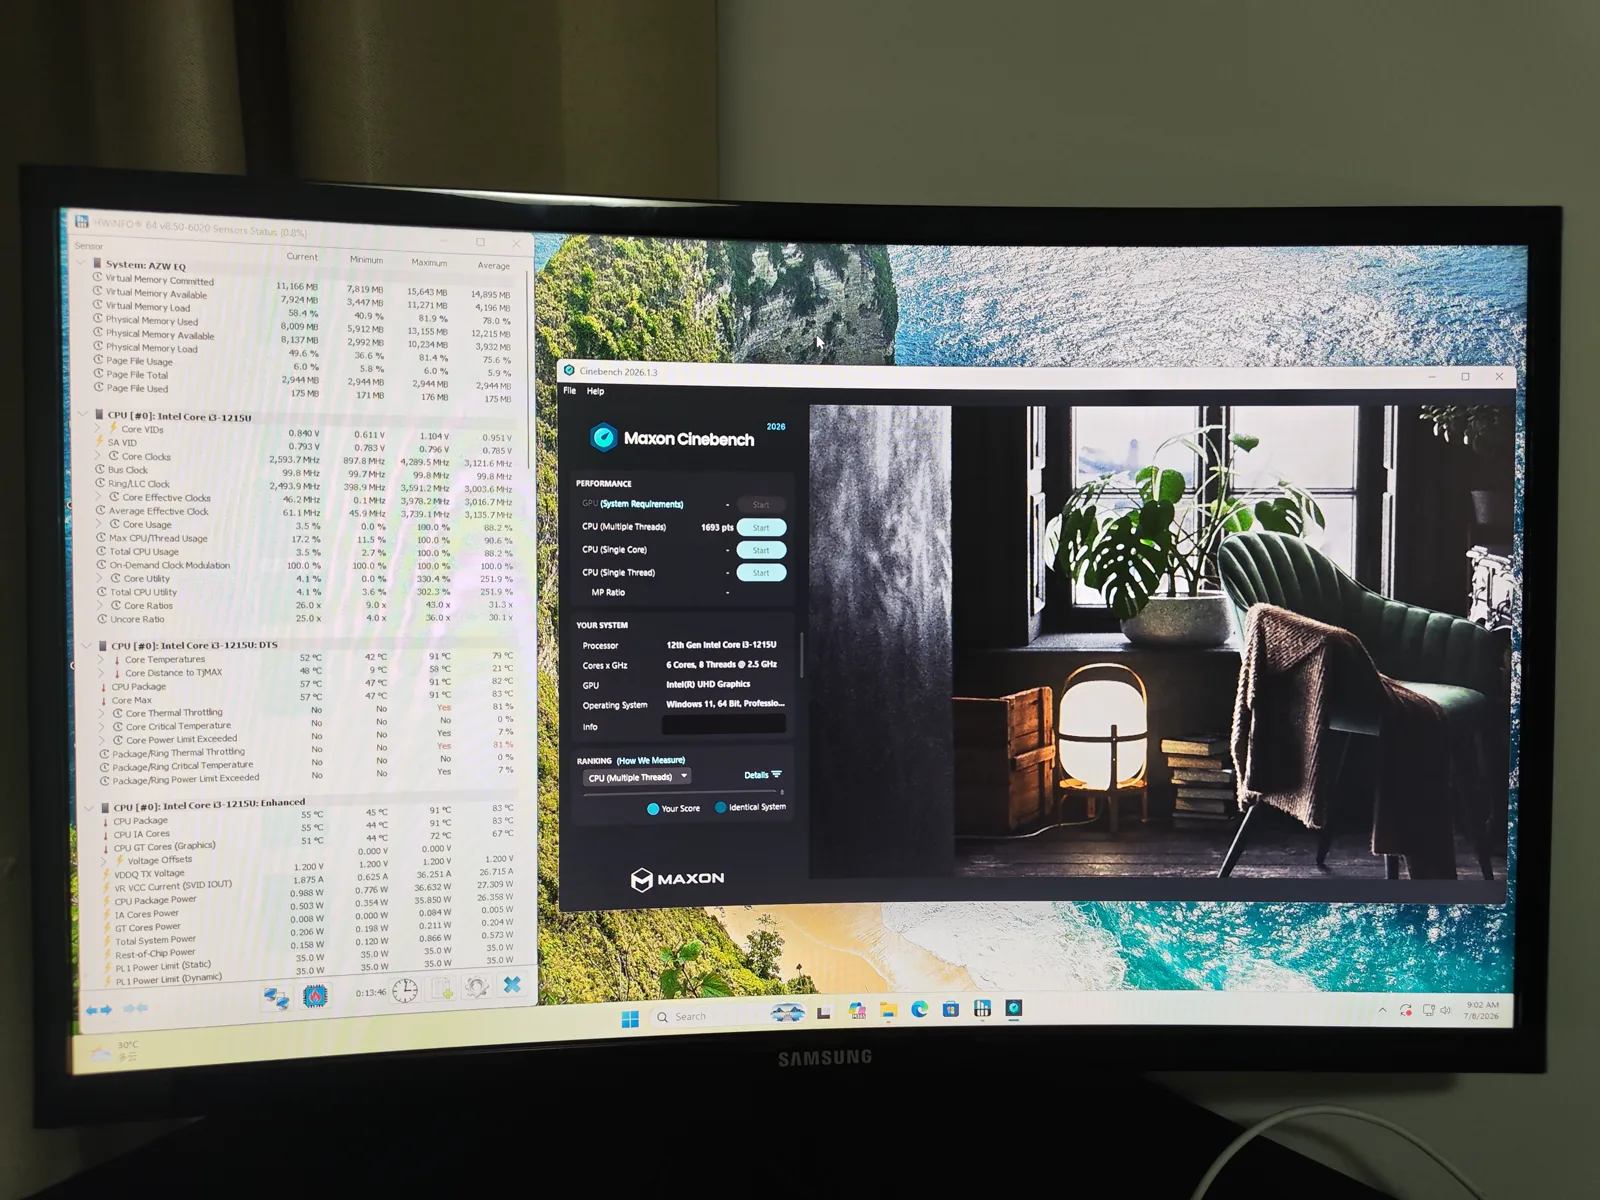
Windows idle was about 14W, the Docker stack idle observation was about 12W, and Jellyfin QSV activity was about 13W. Sustained CPU load reached about 37W. These are wall readings from the complete system and help size a UPS more than they help compare processor efficiency. Plug them into the home server power cost calculator to estimate annual electricity spend for your own rate. For the full calculation method with worked examples, see the home server power cost guide.
The internal WD SN540 is fast enough for this gigabit server. For external backup, test the exact USB-A port: three paths were fast, while one stayed around 40MiB/s. Assign the verified fast connector to the backup SSD and label the cable and port so a later move does not silently lengthen the backup window.
Ongoing maintenance schedule
A server that passed its installation tests still needs a small maintenance routine. Once a week, confirm that the four application endpoints respond, Docker reports healthy containers and the most recent backup completed. Check free space on the internal NVMe and external backup target; a full transcode or database volume can turn an otherwise healthy service into an outage.
Once a month, review Windows Update history, Defender status, Docker and image updates, container restart counts, PostgreSQL and Redis backup logs, and the SMART error counters on the internal SSD. Apply updates in a planned window, then repeat one restart and application-return check. Do not update every image blindly: read release notes, keep the current Compose file and record the image tags that were known to work.
Once a quarter, restore PostgreSQL and Redis into temporary targets and compare the recovered markers or application records. Send a shutdown WOL packet from the normal remote device, and verify one AC-return cycle only if the power setup can be tested safely. Inspect the labeled Ethernet and backup USB connections after moving or cleaning the equipment.
Keep a short change log containing the date, Windows build, graphics and network driver versions, BIOS revision, Docker Desktop version, service image tags and outcome of the recovery check. This turns a future regression into a before-and-after comparison instead of a fresh investigation.
Security before leaving it unattended
The server should not expose Docker test ports, SMB or Jellyfin administration directly to the public internet. Restrict Windows Firewall rules to the required LAN profiles and addresses. Disable SMB1. Review SMB signing, use unique passwords, keep the browser-accessible services updated and use a VPN or properly managed reverse proxy for remote access.
Also check that temporary benchmark databases, Redis keys, test media and debug logs were removed. Benchmarks often create broad firewall exceptions and simple passwords that are acceptable only on an isolated test LAN.
Final checklist
- Unique Windows identity and computer name established.
- CPU, memory, SSD, BIOS and drivers recorded.
- Active Realtek adapter mapped to the connected physical jack.
- Fast Startup disabled for shutdown WOL.
- Magic-packet wake enabled and tested from another device.
- State After G3 set to S0 and physically tested three times.
- Docker Desktop and containers return without manual intervention.
- nginx, PostgreSQL, Redis and Jellyfin endpoints verified after restart.
- PostgreSQL and Redis backups restored into temporary targets.
- Fast external-storage port identified and labeled.
- SMB1 and temporary test exposures removed.
- UPS and off-device backup plan documented.
Bottom line
The finished EQi12 build behaved like a credible low-power Windows server, not merely a PC with Docker installed. It returned after restart, shutdown WOL and loss of AC power; restored application data; and kept the monitored stack healthy for 12.57 hours. Its operational rules are clear: use shutdown WOL instead of depending on S3, correct the OEM Windows identity before multi-node deployment, choose the tested fast USB port for backups and keep recovery evidence alongside uptime evidence.
Next, use the BIOS guide for the firmware pages, the Realtek WOL guide for adapter details, the 12.57-hour stability report for the monitoring method, and the complete Jellyfin setup guide for media server installation and configuration. For Realtek driver issues, see the r8169 troubleshooting guide. For BIOS power recovery, see the AMI BIOS State After G3 guide.