
Why Jellyfin on a home server
Jellyfin is a free, open-source media server that organizes your movies, TV shows, music and photos, then streams them to any device — in your house or over the internet. Unlike commercial alternatives, there are no subscriptions, no usage limits and no data sent to a third-party cloud.
Running Jellyfin on a low-power mini PC like the Beelink EQi12 (Core i3-1215U) gives you a 24/7 media server that draws about 12–14W at idle and can hardware-transcode up to two 4K streams simultaneously using Intel Quick Sync. This guide walks through the complete setup on Windows, from download to daily use.
What you will have when finished: Jellyfin running as a Windows service, media libraries scanned and organized, Intel QSV hardware transcoding verified, at least one remote access method configured, and a playback client working on your preferred device.
What you need before starting
- A Windows PC — Windows 10 or 11. This guide was tested on Windows 11 with a Beelink EQi12 (Core i3-1215U, 16GB DDR4, 512GB NVMe). Any modern Intel CPU with integrated graphics will work; AMD systems can use VAAPI instead of QSV.
- Your media files stored on the server’s internal drive or an attached USB drive. The internal NVMe is recommended for the transcoding temporary directory because it is significantly faster than most USB paths.
- A stable network connection — wired Ethernet preferred. Wi-Fi works but adds latency and variability to streaming.
- About 30 minutes for the basic setup, longer if you are also configuring remote access.
If you have not yet prepared your mini PC for server use, the Windows home-server build guide covers BIOS configuration, Docker setup, Wake-on-LAN and power-loss recovery.
Step 1: download and install Jellyfin Server
Go to the Jellyfin download page and select Windows as the platform. Download the stable release installer (an .exe file). At the time of writing, the tested version was 10.11.11.
Run the installer. It places Jellyfin in C:\Program Files\Jellyfin\Server and creates a data directory at C:\ProgramData\Jellyfin\Server by default. During installation:
- Accept the default install path or choose a custom location on your system drive.
- Keep the default data path unless you have a specific reason to move it. The data directory holds your database, configuration, metadata cache and transcoding temporary files.
- After installation, Jellyfin starts automatically as a Windows service and listens on port 8096.
Open a browser on the server or any device on your LAN and navigate to http://<server-ip>:8096. You should see the Jellyfin login page:
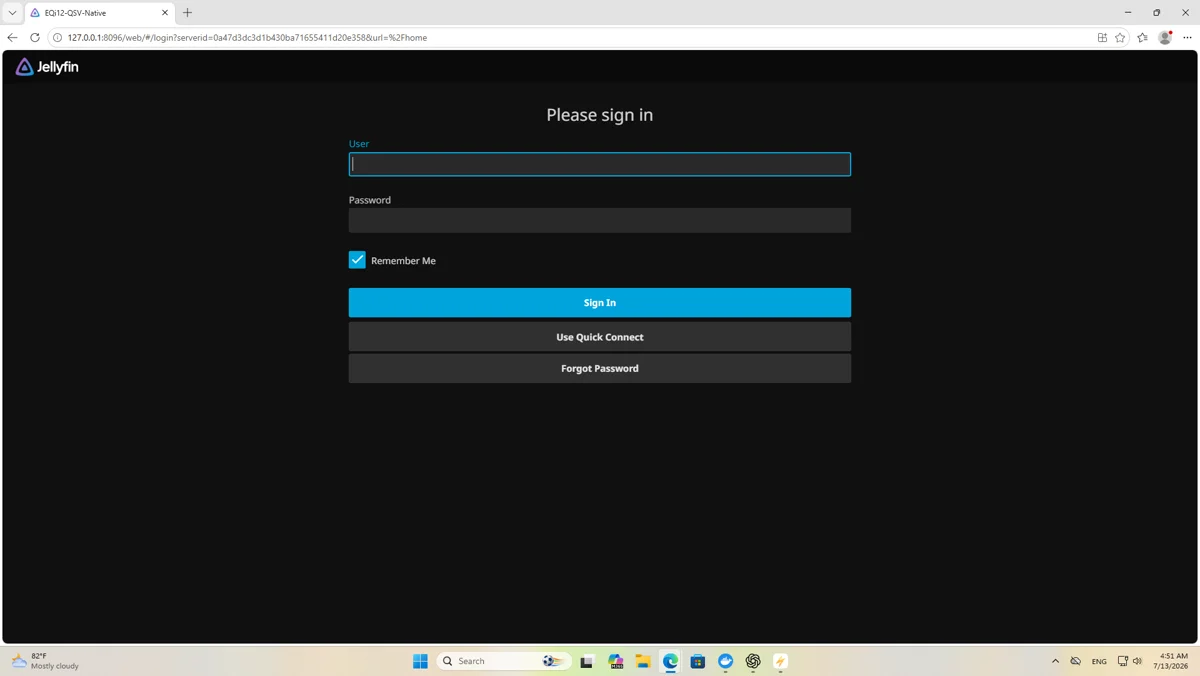
Tip: if the page does not load, check Windows Defender Firewall. The installer usually creates the required inbound rule. If it did not, add a rule allowing TCP port 8096 on your private network profile.
Step 2: run the initial setup wizard
The first time you open Jellyfin, a setup wizard walks through the essentials:
Create an admin account
Choose a username and a strong password. This account has full control over the server, including library management, user accounts and plugin installation. Do not leave the server without a password — even on a private LAN, any device on the network can otherwise access your media.
Select your language and metadata country
These choices affect how Jellyfin fetches movie descriptions, posters and subtitles from metadata providers like TMDB and TVDB. Pick the country where your content was originally published for the best metadata matches.
Add media libraries
Click Add Media Library and choose the content type:
| Library type | Use for |
|---|---|
| Movies | Films — uses TMDB/IMDb metadata |
| Shows | TV series — uses TMDB metadata with season/episode grouping |
| Music | Music albums and tracks — uses MusicBrainz |
| Photos | Photo and video clips |
| Music Videos | Concert recordings and music videos |
| Home Videos | Personal recordings that should not be matched to external metadata |
For each library, point Jellyfin at the folder containing your files. Jellyfin supports network shares (UNC paths like \\server\share) and local drives. If your media lives on a USB drive, use the local path (e.g., D:\Media\Movies).
Choose your metadata language
You can set the preferred metadata language separately from the interface language. For example, you can run the interface in English while fetching Chinese descriptions for your movies.
Finish the wizard
After the last step, Jellyfin begins scanning your libraries. The initial scan speed depends on how many files you have and how fast the storage is. A few hundred movies on an NVMe drive typically finish in under a minute.
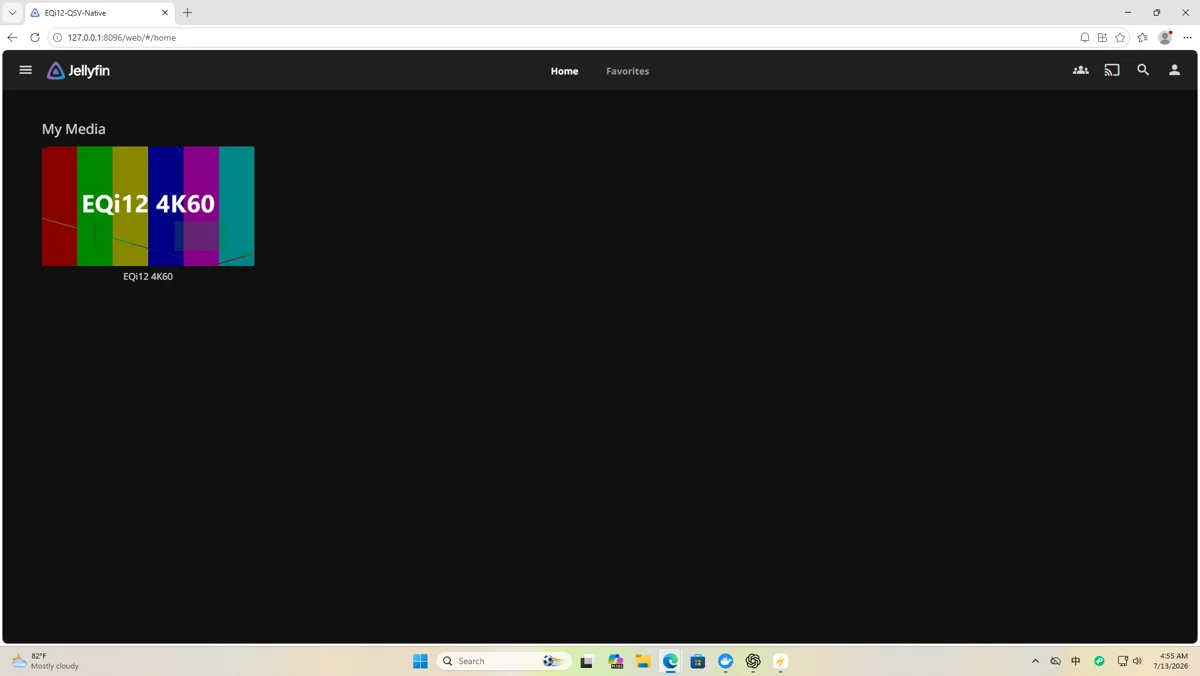
Step 3: organize your media files for best results
Jellyfin identifies content by parsing file and folder names. A well-organized media folder dramatically improves metadata matching and reduces manual corrections.
Recommended folder structure
D:\Media\
├── Movies\
│   ├── The Matrix (1999)\
│   │   ├── The Matrix (1999).mkv
│   │   └── The Matrix (1999).nfo  (optional)
│   └── Inception (2010)\
│       └── Inception (2010).mkv
├── Shows\
│   ├── Breaking Bad\
│   │   ├── Season 01\
│   │   │   ├── Breaking Bad - S01E01.mkv
│   │   │   └── ...
│   │   └── tvshow.nfo  (optional)
│   └── ...
└── Music\
    └── Artist Name\
        └── Album Name\
            └── 01 - Track.flac
Naming conventions that work
- Include the release year in parentheses for movies:
Movie Name (2024).mkv. This single change eliminates most misidentification. - Use the
S01E01format for TV episodes. - Avoid special characters, colons and question marks in file names when possible.
- One file per episode or movie. Multi-part files (
.part1.mkv,.part2.mkv) work but are harder to manage.
Subtitles
Jellyfin supports external subtitle files (.srt, .ass, .ssa) placed alongside the video. Name them to match the video file with a language code:
Movie Name (2024).mkv
Movie Name (2024).en.srt
Movie Name (2024).zh.srt
Embedded subtitles inside MKV containers are also detected automatically. Image-based subtitles (PGS, VobSub) work but may trigger extra processing during transcoding — see the hardware transcoding section below.
Step 4: configure Intel Quick Sync hardware transcoding
This is the step that separates a usable home media server from one that stutters when a client cannot Direct Play. Hardware transcoding uses the Intel GPU’s media engine instead of the CPU, reducing power consumption and allowing multiple simultaneous streams.
On the EQi12 with a Core i3-1215U, verified QSV transcoding handled two simultaneous 4K60-to-1080p60 conversions at real-time speed while drawing only about 13W at the wall — compared to 37W under sustained CPU load.
Enable QSV in Jellyfin
- Open Dashboard → Playback → Transcoding.
- Set Hardware acceleration to Intel Quick Sync (QSV).
- Set the transcoding temporary path to a folder on your internal NVMe drive. The default
C:\ProgramData\Jellyfin\Server\transcodesworks. Avoid placing it on a slow USB drive. - Under Hardware decoders, enable the codecs your Intel GPU supports:
- H.264 — supported on all Intel GPUs since Sandy Bridge.
- HEVC (H.265) — supported on Intel 6th generation (Skylake) and newer.
- VP9 — supported on Intel 7th generation (Kaby Lake) and newer.
- AV1 decode — supported on Intel 11th generation (Tiger Lake) and newer. The i3-1215U can decode AV1 but cannot encode it.
- Leave Enable hardware encoding checked.
- Click Save and restart the Jellyfin service.
Verify that QSV is actually working
Enabling the checkbox is not proof. To confirm:
- Play a video that requires transcoding — force it by lowering the client quality setting below the source resolution or bitrate.
- In the Jellyfin dashboard, confirm the session says Transcoding (not Direct Play or Remuxing).
- Open the generated FFmpeg log from Jellyfin’s log directory and look for:
h264_qsvorhevc_qsvin the encoder line — this confirms hardware encoding.vpp_qsvwhen resolution changes — this confirms hardware scaling.- If you see
libx264instead ofh264_qsv, the server has fallen back to software encoding.
Before planning simultaneous 4K streams, use the Jellyfin QSV calculator to estimate how many concurrent transcodes this hardware can sustain, based on the measured codec matrix from our test runs.
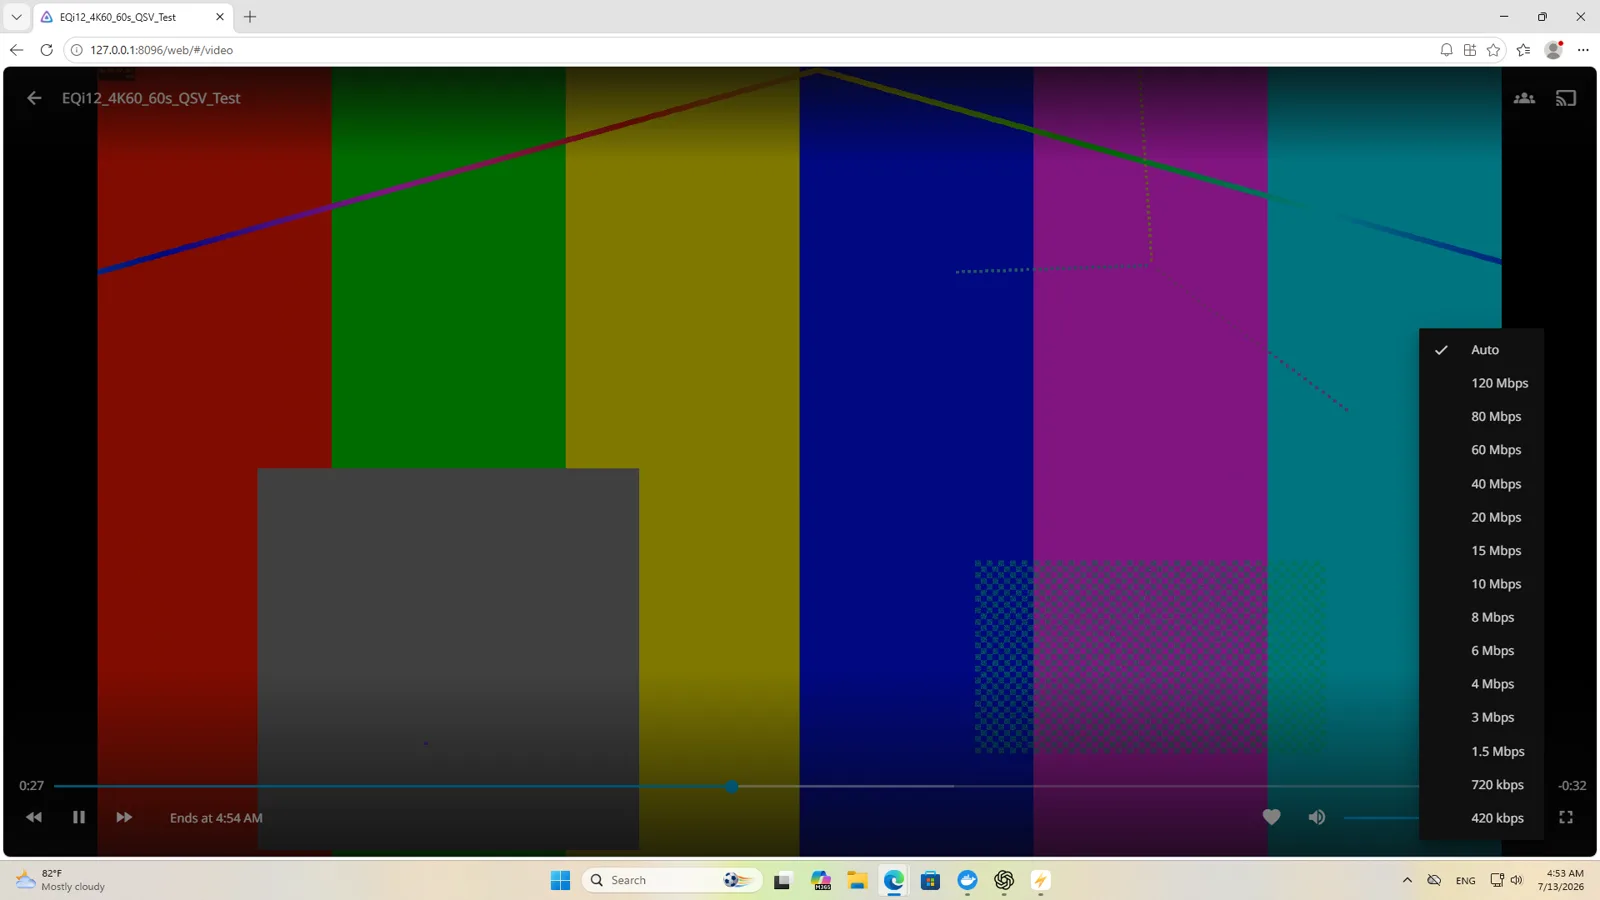
For a detailed walkthrough with screenshots and the complete codec test matrix, see the Jellyfin Intel QSV setup guide. If QSV is enabled but the log shows software encoding, follow the QSV troubleshooting guide.
Expected codec support by Intel generation
| Codec | 12th Gen (Alder Lake) | Notes |
|---|---|---|
| H.264 decode | Yes | |
| HEVC Main10 decode | Yes | |
| VP9 decode | Yes | |
| AV1 decode | Yes | First gen with AV1 decode |
| H.264 encode | Yes | |
| HEVC Main10 encode | Yes | |
| AV1 encode | No | Not available on i3-1215U |
Step 5: set up playback clients
Jellyfin has official clients for most platforms:
- Web browser — works at
http://<server-ip>:8096on any device. Best on desktop browsers. - Android / Android TV — available from Google Play or the Jellyfin website.
- iOS / Apple TV — available from the App Store (a small one-time fee supports development).
- Roku — available from the Roku Channel Store.
- Smart TVs — some Samsung and LG models have native Jellyfin apps; otherwise use a streaming device.
Optimize client playback
For the best experience without transcoding:
- Use Direct Play whenever the client supports the source codec, container and audio format. Direct Play sends the file unchanged — zero server CPU usage.
- Lower client quality only when needed — for remote streaming or when the client cannot handle the source resolution.
- Prefer hardware-compatible subtitle formats — SRT subtitles can be sent to the client for rendering. Image-based subtitles (PGS) may require server-side burn-in, which adds processing.
Test your setup
Play a file you know the codec details for. Check the Jellyfin dashboard to see whether the session is Direct Play, Remuxing or Transcoding. If everything is Direct Play on your local network, your server is delivering media efficiently.
Step 6: configure remote access
Streaming outside your home network requires one of these approaches, listed from simplest to most capable:
Option A: Tailscale (recommended for most users)
Tailscale creates a private mesh network between your devices. Install Tailscale on the server and your phone or laptop, and access Jellyfin at http://<tailscale-ip>:8096 from anywhere — no port forwarding, no public exposure.
Pros: zero router configuration, encrypted traffic, free for personal use. Cons: all traffic routes through Tailscale’s infrastructure (or direct peer-to-peer when possible); slight latency overhead.
Option B: reverse proxy with HTTPS
For a traditional setup, place a reverse proxy (Caddy, nginx, or Traefik) in front of Jellyfin with a domain name and a TLS certificate. This gives you https://media.yourdomain.com with proper HTTPS.
This approach requires:
- A domain name with a DNS record pointing to your home IP, or a dynamic DNS service.
- Port 443 forwarded to the reverse proxy.
- The reverse proxy configured to pass requests to
localhost:8096.
Security note: never expose Jellyfin’s port 8096 directly to the internet without authentication and HTTPS. The server holds your media library and user accounts.
Option C: VPN
Run a VPN server (WireGuard or OpenVPN) on your network. Connect from outside, then access Jellyfin at its LAN address. This is the most private option but requires connecting to the VPN before streaming.
For help choosing between these options — mesh VPN vs raw WireGuard vs Layer 2, including CGNAT constraints and free-tier terms verified in October 2026 — see our Tailscale vs WireGuard vs ZeroTier comparison.
Whichever method you choose, test playback from outside your network before considering the setup complete. Remote streaming quality depends on your upload bandwidth — most home connections have 10–20Mbps upload, which is enough for one or two 1080p streams but may struggle with multiple 4K Direct Play clients.
Step 7: tune performance and storage
Transcoding temporary directory
Set the transcoding path to your fastest internal drive. On the EQi12, the internal NVMe (WD SN540) handles transcoding without bottleneck. A USB-connected drive measured around 40MiB/s in testing — fast enough for a single stream but a liability under concurrent load. Use the network transfer time calculator to verify that your chosen drive can sustain your expected concurrent streams.
Configure a cleanup policy: Jellyfin removes old transcode segments automatically, but if the disk fills up during a marathon session, playback stops. Keep at least 20GB free on the transcoding volume.
When your media library grows beyond a single drive, plan the storage layout before adding disks. The ZFS & RAID storage planning guide compares RAIDZ1, RAIDZ2, RAIDZ3 and mirror with real capacity numbers and explains why rebuild risk increases as arrays get larger.
Concurrent stream capacity
The tested EQi12 handled two simultaneous 4K60-to-1080p60 QSV transcodes at real-time speed. Four streams completed but fell below real time. For a household of two to four people with mixed content, this is usually sufficient. If you regularly need more concurrent transcodes, consider:
- Lowering the default transcode quality (1080p at 8–10Mbps is a good balance).
- Encouraging clients to Direct Play when possible.
- Using a machine with a more powerful Intel GPU or a dedicated GPU.
Library scan schedule
Jellyfin scans for new content periodically. The default interval is reasonable for most setups. If you add content manually via SMB or a download client, you can also trigger a scan from the dashboard or use the Jellyfin API.
Step 8: enable useful optional features
Trickplay images (preview thumbnails)
Jellyfin can generate chapter preview images for the timeline scrubber. This improves the browsing experience significantly. Enable it under Dashboard → Playback → Trickplay. Generation runs during idle time and uses the GPU if QSV is available.
Intro and credits detection
Plugins like Intro Detector can identify and skip TV show intros automatically. Install plugins from Dashboard → Plugins → Catalog.
Auto-organize and rename
The Auto Box Sets and Collection Manager plugins group movie franchises together. The Fanart plugin adds additional artwork sources.
DLNA
If you have older media players or game consoles that support DLNA/UPnP, enable it under Dashboard → DLNA. This allows devices to discover and play media from Jellyfin without a dedicated client app.
Common problems and how to fix them
Jellyfin says Direct Play but I wanted to test transcoding
Direct Play is not a failure — it means the client accepts the file as-is. To force a transcode for testing, lower the client quality setting or use a client that does not support the source codec. See the QSV verification guide for the controlled test method.
High CPU usage during playback
The server is likely software-encoding. Check the FFmpeg log for libx264 instead of h264_qsv. Common causes: Intel graphics driver not installed, QSV not selected in dashboard, or the codec is not supported by your GPU generation. Follow the QSV troubleshooting guide.
Subtitles are not showing
External subtitle files must be in the same folder as the video and match the file name with a language code. Embedded PGS subtitles may require server-side processing. Check the playback settings for subtitle mode — some clients default to “None.”
Media is not being identified correctly
Add the year to the file name: Movie Name (2024).mkv. For TV shows, use the S01E01 format. If a file is still misidentified, use the Edit button in the Jellyfin interface to manually search for the correct entry. You can also create .nfo files alongside the video for precise control.
Server is unreachable from other devices
Check Windows Firewall rules for port 8096. Confirm the server’s IP address has not changed (reserve it in your router or set a static address). If you recently changed the network profile from Public to Private (or vice versa), the firewall rules may need to be re-applied.
Preserving privacy before sharing screenshots
If you post about your setup online or ask for help in the Jellyfin forums, remember to redact:
- Usernames and account names.
- Library paths that reveal your file structure.
- IP addresses and port numbers beyond the default 8096.
- API keys and tokens.
- Media file names that contain personal information.
Keep an unedited private copy for your own records.
What to do next
Once your basic Jellyfin server is running, these guides extend the setup:
- Jellyfin Intel QSV setup and verification — detailed hardware transcoding walkthrough with codec matrix and FFmpeg log analysis.
- Jellyfin vs Plex on a mini PC — if you are still choosing between the two servers, this comparison starts from what an i3-1215U actually transcodes and what a Plex Pass costs in 2026.
- Windows home-server build — Docker, Wake-on-LAN, auto-start and power-loss recovery for a complete unattended server.
- Docker Desktop auto-start guide — make your containers survive reboots automatically.
- AC power recovery BIOS setup — boot automatically after a power outage.
- Fix Jellyfin software transcoding — diagnose why QSV is not being used despite being enabled.
Bottom line
Setting up Jellyfin on a Windows home server is straightforward: install the server, point it at your media, enable hardware transcoding, and connect your clients. The Core i3-1215U handles everyday streaming with room to spare — two simultaneous 4K transcodes at real-time speed, about 13W during active transcoding, and fully automatic recovery after power loss. The key to a smooth deployment is verifying that QSV is actually being used (not just enabled), placing transcode temporary files on the internal NVMe, and choosing a remote access method that does not expose your server directly to the internet.